Linux-related pages, mostly about system administration.
A while back I posted about Comcast blocking outgoing traffic on
port 25. We've spent some time with
Verizon's DSL service, but after our recent move we're back with
Comcast. Luckily, Comcast now explicitly lists the ports they
block. Nothing I care about, except for port 25 (incoming and
outgoing). For incoming mail, I use Dyn to forward mail to port
587. For outgoing mail, I had been using stunnel
through outgoing.verizon.net for my SMTP connections. Comcast
takes a similar approach forcing outgoing mail through port
465 on smtp.comcast.net.
In my gitweb post, I explain how to setup git daemon to serve
git:// requests under Nginx on Gentoo. This post talks
about a different situation, where you want to toss up a Git daemon
for collaboration on your LAN. This is useful when you're teaching
Git to a room full of LAN-sharing students, and you don't want to
bother setting up public repositories more permanently.
Serving a few repositories
Say you have a repository that you want to serve:
$ mkdir -p ~/src/my-project
$ cd ~/src/my-project
$ git init
$ …hack hack hack…
Fire up the daemon (probably in another terminal so you can keep hacking in your original terminal) with:
$ cd ~/src
$ git daemon --export-all --base-path=. --verbose ./my-project
Then you can clone with:
$ git clone git://192.168.1.2/my-project
replacing 192.168.1.2 with your public IP address (e.g. from ip
addr show scope global). Add additional repository paths to the git
daemon call to serve additional repositories.
Serving a single repository
If you don't want to bother listing my-project in your URLs, you can
base the daemon in the project itself (instead of in the parent
directory):
$ cd
$ git daemon --export-all --base-path=src/my-project --verbose
Then you can clone with:
$ git clone git://192.168.1.2/
This may be more convenient if you're only sharing a single repository.
Enabling pushes
If you want your students to be able to push to your repository during class, you can run:
$ git daemon --enable=receive-pack …
Only do this on a trusted LAN with a junk test repository, because it will allow anybody to push anything or remove references.
I've been wanting to get into microcontroller programming for a while now, and last week I broke down and ordered components for a breadboard Arduino from Mouser. There's a fair amount of buzz about the Arduino platform, but I find the whole sketch infrastucture confusing. I'm a big fan of command line tools in general, so the whole IDE thing was a bit of a turn off.
Because the ATMega328 doesn't have a USB controller, I also bought a Teensy 2.0 from PJRC. The Teensy is just an ATMega32u4 on a board with supporting hardware (clock, reset switch, LED, etc). I've packed the Teensy programmer and HID listener in my Gentoo overlay, to make it easier to install them and stay up to date.
Arduinos (and a number of similar projects) are based on AVR microcontrollers like the ATMegas. Writing code for an AVR processor is the similar to writing code for any other processor. GCC will cross-compile your code once you've setup a cross-compiling toolchain. There's a good intro to the whole embedded approach in the Gentoo Embedded Handbook.
For all the AVR-specific features you can use AVR-libc, an open source C library for AVR processors. It's hard to imagine doing anything interesting without using this library, so you should at least skim through the manual. They also have a few interesting demos to get you going.
AVR-libc sorts chip-support code into AVR architecture subdirectories.
For example, object code specific to my ATMega32u4 is installed at
/usr/avr/lib/avr5/crtm32u4.o. avr5 is the AVR architecture
version of this chip.
Crossdev
Since you will probably not want to build a version of GCC that runs on your AVR chip, you'll be building a cross comiling toolchain. The toolchain will allow you to use your development box to compile programs for your AVR chip. On Gentoo, the recommended approach is to use crossdev to build the toolchain (although crossdev's AVR support can be flaky). They suggest you install it in a stage3 chroot to protect your native toolchain, but I think it's easier to just make btrfs snapshots of my hard drive before doing something crazy. I didn't have any trouble skipping the chroot on my sytem, but your mileage may vary.
# emerge -av crossdev
Because it has per-arch libraries (like avr5), AVR-libc needs to be
built with multilib support. If you (like me) have avoided
multilib like the plague so far, you'll need to patch crossdev to turn
on multilib for the AVR tools. Do this by applying Jess'
patch from bug 377039.
# wget -O crossdev-avr-multilib.patch 'https://bugs.gentoo.org/attachment.cgi?id=304037'
# patch /usr/bin/crossdev < crossdev-avr-multilib.patch
If you're using a profile where multilib is masked
(e.g. default/linux/x86/10.0/desktop) you should use Niklas'
extended version of the patch from the duplicate bug
378387.
Despite claiming to use the last overlay in PORTDIR_OVERLAY,
crossdev currently uses the first, so if you use
layman to manage your overlays (like mine),
you'll want to tweak your make.conf to look like:
source /var/lib/layman/make.conf
PORTDIR_OVERLAY="/usr/local/portage ${PORTDIR_OVERLAY}"
Now you can install your toolchain following the Crossdev wiki. First install a minimal GCC (stage 1) using
# USE="-cxx -openmp" crossdev --binutils 9999 -s1 --without-headers --target avr
Then install a full featured GCC (stage 4) using
# USE="cxx -nocxx" crossdev --binutils 9999 -s4 --target avr
I use binutils-9999 to install live from the git mirror,
which avoids a segfault bug in binutils 2.22.
After the install, I was getting bit by bug 147155:
cannot open linker script file ldscripts/avr5.x
Which I work around with:
# ln -s /usr/x86_64-pc-linux-gnu/avr/lib/ldscripts /usr/avr/lib/ldscripts
Now you're ready. Go forth and build!
Cross compiler construction
Why do several stages of GCC need to be built anyway? From crossdev
--help, here are the stages:
- Build just binutils
- Also build a bare C compiler (no C library/C++/shared GCC libs/C++ exceptions/etc…)
- Also build kernel headers
- Also build the C library
- Also build a full compiler
Available in a git repository.
Repository: curses-check-for-keypress
Browsable repository: curses-check-for-keypress
Author: W. Trevor King
There are some points in my experiment control code where the program does something for an arbitrary length of time (e.g, waits while the operator manually adjusts a laser's alignment). For these situations, I wanted to be able to loop until the user pressed a key. This is a simple enough idea, but the implementation turned out to be complicated enough for me to spin it out as a stand-alone module.
I've been using abcde to rip our audio CD collection onto our fileserver for a few years now. Then I can play songs from across the collection using MPD without having to dig the original CDs out of the closet. I just picked up a large external hard drive and thought it might be time to take a look at ripping our DVD collection as well.
There is an excellent Quick-n-Dirty Guide that goes into more detail on all of this, but here's an executive summary.
Make sure your kernel understands the UDF file system:
$ grep CONFIG_UDF_FS /usr/src/linux/.config
If your kernel was compiled with CONFIG_IKCONFIG_PROC enabled, you
could use
$ zcat /proc/config.gz | grep CONFIG_UDF_FS
instead, to make sure you're checking the configuration of the
currently running kernel. If the udf driver was compiled as a
module, make sure it's loaded.
$ sudo modprobe udf
Mount your DVD somewhere:
$ sudo mount /dev/dvd /mnt/dvd
Now you're ready to rip. You've got two options: you can copy the VOBs over directly, or rip the DVD into an alternative container format such as Matroska.
Vobcopy
Mirror the disc with vobcopy (media-video/vobcopy on Gentoo):
$ vobcopy -m -t "Awesome_Movie" -v -i /mnt/dvd -o ~/movies/
Play with Mplayer (media-video/mplayer on Gentoo):
$ mplayer -nosub -fs -dvd-device ~/movies/Awesome_Movie dvd://1
where -nosub and -fs are optional.
Matroska
Remux the disc (without reencoding) with mkvmerge (from
MKVToolNix, media-video/mkvtoolnix on Gentoo):
$ mkvmerge -o ~/movies/Awesome_Movie.mkv /mnt/dvd/VIDEO_TS/VTS_01_1.VOB
(Processing the following files as well: "VTS_01_2.VOB", "VTS_01_3.VOB", "VTS_01_4.VOB", "VTS_01_5.VOB")
Then you can do all the usual tricks. Here's an example of extracting
a slice of the Matroska file as silent video in an AVI container with
mencoder (from Mplayer, media-video/mplayer on Gentoo):
$ mencoder -ss 00:29:20.3 -endpos 00:00:21.6 Awesome_Movie.mkv -nosound -of avi -ovc copy -o silent-clip.avi
Here's an example of extracting a slice of the Matroska file as audio in an AC3 container:
$ mencoder -ss 51.1 -endpos 160.9 Awesome_Movie.mkv -of rawaudio -ovc copy -oac copy -o audio-clip.ac3
You can also take a look through the Gentoo wiki and this Ubuntu thread for more ideas.
Allen Rueter points out that one way to kill a defunct process is to kill its parent or child:
# ps -ef | grep '<defunct>\|PPID'
UID   PID  PPID  C    STIME TTY      TIME CMD
zzz 13868     1  0                   0:00 <defunct>
# ps -ef | grep '13868\|PPID'
UID   PID  PPID  C    STIME TTY      TIME CMD
zzz 13868     1  0                   0:00 <defunct>1
zzz 16596 13868  0                   0:00 a.out
# kill -9 16596
Available in a git repository.
Repository: pyassuan
Browsable repository: pyassuan
Author: W. Trevor King
I've been trying to come up with a clean way to verify detached PGP signatures from Python. There are a number of existing approaches to this problem. Many of them call gpg using Python's multiprocessing or subprocess modules, but to verify detached signatures, you need to send the signature in on a separate file descriptor, and handling that in a way safe from deadlocks is difficult. The other approach, taken by PyMe is to wrap GPGME using SWIG, which is great as far as it goes, but development seems to have stalled, and I find the raw GPGME interface excessively complicated.
The GnuPG tools themselves often communicate over sockets using the
Assuan protocol, and I'd already written an Assuan server to
handle pinentry (originally for my gpg-agent post, not part of
pyassuan). I though it would be natural if there was a gpgme-agent
which would handle cryptographic tasks over this protocol, which would
make the pgp-mime implementation easier. It turns out that there
already is such an agent (gpgme-tool), so I turned my pinentry
script into the more general pyassuan package. Now using Assuan from
Python should be as easy (or easier?) than using it from C via
libassuan.
The README is posted on the PyPI page.
Available in a git repository.
Repository: pygrader
Browsable repository: pygrader
Author: W. Trevor King
The last two courses I've TAd at Drexel have been scientific computing courses where the students are writing code to solve homework problems. When they're done, they email the homework to me, and I grade it and email them back their grade and comments. I've played around with developing a few grading frameworks over the years (a few years back, one of the big intro courses kept the grades in an Excel file on a Samba share, and I wrote a script to automatically sync local comma-separated-variable data with that spreadsheet. Yuck :p), so I figured this was my change to polish up some old scripts into a sensible system to help me stay organized. This system is pygrader.
During the polishing phase, I was searching around looking for prior art ;), and found that Alex Heitzmann had already created pygrade, which is the name I under which I had originally developed my own project. While they are both grade databases written in Python, Alex's project focuses on providing a more integrated grading environment.
Pygrader accepts assignment submissions from students through its
mailpipe command, which you can run on your email inbox (or from
procmail). Students submit assignments with an email subject like
[submit] <assignment name>
mailpipe automatically drops the submissions into a
student/assignment/mail mailbox, extracts any MIME attachments
into the student/assignment/ directory (without clobbers, with
proper timestamps), and leaves you to get to work.
Pygrader also supports multiple graders through the mailpipe
command. The other graders can request a student's submission(s) with
an email subject like
[get] <student name>, <assignment name>
Then they can grade the submission and mail the grade back with an email subject like
[grade] <student name>, <assignment name>
The grade-altering messages are also stored in the
student/assignment/mail mailbox, so you can peruse them later.
Pygrader doesn't spawn editors or GUIs to help you browse through submissions or assigning grades. As far as I am concerned, this is a good thing.
When you're done grading, pygrader can email (email) your grades and
comments back to the students, signing or encrypting with pgp-mime
if either party has configured a PGP key. It can also email a
tab-delimited table of grades to the professors to keep them up to
speed. If you're running mailpipe via procmail, responses to grade
request are sent automatically.
While you're grading, pygrader can search for ungraded assignments, or
for grades that have not yet been sent to students (todo). It can
also check for resubmissions, where new submissions come in response
to earlier grades.
The README is posted on the PyPI page.
This example shows the details of linking a simple program from three
source files. There are three ways to link: directly from object
files, statically from static libraries, or dynamically from shared
libraries. If you're following along in my example
source, you can compile the three flavors of the
hello_world program with:
$ make
And then run them with:
$ make run
Compiling and linking
Here's the general compilation process:
- Write code in a human-readable language (C, C++, …).
- Compile the code to object files (
*.o) using a compiler (gcc,g++, …). - Link the code into executables or libraries using a linker
(
ld,gcc,g++, …).
Object files are binary files containing machine code versions of the human-readable code, along with some bookkeeping information for the linker (relocation information, stack unwinding information, program symbols, …). The machine code is specific to a particular processor architecture (e.g. x86-64).
Linking files resolves references to symbols defined in translation
units, because a single object file will rarely (never?) contain
definitions for all the symbols it requires. It's easy to get
confused about the difference between compiling and linking, because
you often use the same program (e.g. gcc) for both steps. In
reality, gcc is performing the compilation on its own, but is
using external utilities like ld for the linking. To see this in
action, add the -v (verbose) option to your gcc (or g++)
calls. You can do this for all the rules in the Makefile with:
make CC="gcc -v" CXX="g++ -v"
On my system, that shows g++ using /lib64/ld-linux-x86-64.so.2
for dynamic linking. On my system, C++ seems to require at least some
dynamic linkning, but a simple C program like simple.c can be
linked statically. For static linking, gcc uses collect2.
Symbols in object files
Sometimes you'll want to take a look at the symbols exported and
imported by your code, since there can be subtle bugs if you
link two sets of code that use the same symbol for different purposes.
You can use nm to inspect the intermediate object files. I've saved
the command line in the Makefile:
$ make inspect-object-files
nm -Pg hello_world.o print_hello_world.o hello_world_string.o
hello_world.o:
_Z17print_hello_worldv U
main T 0000000000000000 0000000000000010
print_hello_world.o:
_Z17print_hello_worldv T 0000000000000000 0000000000000027
_ZNSolsEPFRSoS_E U
_ZNSt8ios_base4InitC1Ev U
_ZNSt8ios_base4InitD1Ev U
_ZSt4cout U
_ZSt4endlIcSt11char_traitsIcEERSt13basic_ostreamIT_T0_ES6_ U
_ZStlsISt11char_traitsIcEERSt13basic_ostreamIcT_ES5_PKc U
__cxa_atexit U
__dso_handle U
hello_world_string U
hello_world_string.o:
hello_world_string R 0000000000000010 0000000000000008
The output format for nm is described in its man page. With the
-g option, output is restricted to globally visible symbols. With
the -P option, each symbol line is:
<symbol> <type> <offset-in-hex> <size-in-hex>
For example, we see that hello_world.o defines a global text
symbol main with at position 0 with a size of 0x10. This is where
the loader will start execution.
We also see that hello_world.o needs (i.e. “has an undefineed symbol
for”) _Z17print_hello_worldv. This means that, in order to run,
hello_world.o must be linked against something else which provides
that symbol. The symbol is for our print_hello_world function. The
_Z17 prefix and v postfix are a result of name
mangling, and depend on the compiler used and function
signature. Moving on, we see that print_hello_world.o defines the
_Z17print_hello_worldv at position 0 with a size of 0x27. So
linking print_hello_world.o with hello_world.o would resolve the
symbols needed by hello_world.o.
print hello_world.o has undefined symbols of its own, so we can't
stop yet. It needs hello_world_string (provided by
hello_world_string.o), _ZSt4cout (provided by libcstd++),
….
The process of linking involves bundling up enough of these partial code chunks so that each of them has access to the symbols it needs.
There are a number of other tools that will let you poke into the
innards of object files. If nm doesn't scratch your itch, you may
want to look at the more general objdump.
Storage classes
In the previous section I mentioned “globally visible symbols”. When you declare or define a symbol (variable, function, …), you can use storage classes to tell the compiler about your symbols' linkage and storage duration.
For more details, you can read through §6.2.2 Linkages of identifiers, §6.2.4 Storage durations of objects, and §6.7.1 Storage-class specifiers in WG14/N1570, the last public version of ISO/IEC 9899:2011 (i.e. the C11 standard).
Since we're just worried about linking, I'll leave the discussion of
storage duration to others. With linkage, you're basically deciding
which of the symbols you define in your translation unit should be
visible from other translation units. For example, in
print_hello_world.h, we declare that there is a function
print_hello_world (with a particular signature). The extern
means that may be defined in another translation unit. For
block-level symbols (i.e. things defined in the root level of your
source file, not inside functions and the like), this is the default;
writing extern just makes it explicit. When we define the
function in print_hello_world.cpp, we also label it as extern
(again, this is the default). This means that the defined symbol
should be exported for use by other translation units.
By way of comparison, the string secret_string defined in
hello_world_string.cpp is declared static. This means that
the symbol should be restricted to that translation unit. In other
words, you won't be able to access the value of secret_string from
print_hello_world.cpp.
When you're writing a library, it is best to make any functions that
you don't need to export static and to avoid global variables
altogether.
Static libraries
You never want to code everything required by a program on your own.
Because of this, people package related groups of functions into
libraries. Programs can then take use functions from the library, and
avoid coding that functionality themselves. For example, you could
consider print_hello_world.o and hello_world_string.o to be
little libraries used by hello_world.o. Because the two object
files are so tightly linked, it would be convenient to bundle them
together in a single file. This is what static libraries are, bundles
of object files. You can create them using ar (from “archive”;
ar is the ancestor of tar, from “tape archive”).
You can use nm to list the symbols for static libraries exactly as
you would for object files:
$ make inspect-static-library
nm -Pg libhello_world.a
libhello_world.a[print_hello_world.o]:
_Z17print_hello_worldv T 0000000000000000 0000000000000027
_ZNSolsEPFRSoS_E U
_ZNSt8ios_base4InitC1Ev U
_ZNSt8ios_base4InitD1Ev U
_ZSt4cout U
_ZSt4endlIcSt11char_traitsIcEERSt13basic_ostreamIT_T0_ES6_ U
_ZStlsISt11char_traitsIcEERSt13basic_ostreamIcT_ES5_PKc U
__cxa_atexit U
__dso_handle U
hello_world_string U
libhello_world.a[hello_world_string.o]:
hello_world_string R 0000000000000010 0000000000000008
Notice that nothing has changed from the object file output, except
that object file names like print_hello_world.o have been replaced
by libhello_world.a[print_hello_world.o].
Shared libraries
Library code from static libraries (and object files) is built into
your executable at link time. This means that when the library is
updated in the future (bug fixes, extended functionality, …), you'll
have to relink your program to take advantage of the new features.
Because no body wants to recompile an entire system when someone makes
cout a bit more efficient, people developed shared libraries. The
code from shared libraries is never built into your executable.
Instead, instructions on how to find the dynamic libraries are built
in. When you run your executable, a loader finds all the shared
libraries your program needs and copies the parts you need from the
libraries into your program's memory. This means that when a system
programmer improves cout, your program will use the new version
automatically. This is a Good Thing™.
You can use ldd to list the shared libraries your program needs:
$ make list-executable-shared-libraries
ldd hello_world
        linux-vdso.so.1 =>  (0x00007fff76fbb000)
        libstdc++.so.6 => /usr/lib/gcc/x86_64-pc-linux-gnu/4.5.3/libstdc++.so.6 (0x00007ff7467d8000)
        libm.so.6 => /lib64/libm.so.6 (0x00007ff746555000)
        libgcc_s.so.1 => /lib64/libgcc_s.so.1 (0x00007ff74633e000)
        libc.so.6 => /lib64/libc.so.6 (0x00007ff745fb2000)
        /lib64/ld-linux-x86-64.so.2 (0x00007ff746ae7000)
The format is:
soname => path (load address)
You can also use nm to list symbols for shared libraries:
$ make inspect-shared-libary | head
nm -Pg --dynamic libhello_world.so
_Jv_RegisterClasses w
_Z17print_hello_worldv T 000000000000098c 0000000000000034
_ZNSolsEPFRSoS_E U
_ZNSt8ios_base4InitC1Ev U
_ZNSt8ios_base4InitD1Ev U
_ZSt4cout U
_ZSt4endlIcSt11char_traitsIcEERSt13basic_ostreamIT_T0_ES6_ U
_ZStlsISt11char_traitsIcEERSt13basic_ostreamIcT_ES5_PKc U
__bss_start A 0000000000201030
__cxa_atexit U
__cxa_finalize w
__gmon_start__ w
_edata A 0000000000201030
_end A 0000000000201048
_fini T 0000000000000a58
_init T 0000000000000810
hello_world_string D 0000000000200dc8 0000000000000008
You can see our hello_world_string and _Z17print_hello_worldv,
along with the undefined symbols like _ZSt4cout that our code
needs. There are also a number of symbols to help with the shared
library mechanics (e.g. _init).
To illustrate the “link time” vs. “load time” distinction, run:
$ make run
./hello_world
Hello, World!
./hello_world-static
Hello, World!
LD_LIBRARY_PATH=. ./hello_world-dynamic
Hello, World!
Then switch to the Goodbye definition in
hello_world_string.cpp:
//extern const char * const hello_world_string = "Hello, World!";
extern const char * const hello_world_string = "Goodbye!";
Recompile the libraries (but not the executables) and run again:
$ make libs
…
$ make run
./hello_world
Hello, World!
./hello_world-static
Hello, World!
LD_LIBRARY_PATH=. ./hello_world-dynamic
Goodbye!
Finally, relink the executables and run again:
$ make
…
$ make run
./hello_world
Goodbye!
./hello_world-static
Goodbye!
LD_LIBRARY_PATH=. ./hello_world-dynamic
Goodbye!
When you have many packages depending on the same low-level libraries, the savings on avoided rebuilding is large. However, shared libraries have another benefit over static libraries: shared memory.
Much of the machine code in shared libraries is static (i.e. it doesn't change as a program is run). Because of this, several programs may share the same in-memory version of a library without stepping on each others toes. With statically linked code, each program has its own in-memory version:
| Static | Shared |
|---|---|
| Program A → Library B | Program A → Library B |
| Program C → Library B | Program C ⎯⎯⎯⎯⬏ |
Further reading
If you're curious about the details on loading and shared libraries, Eli Bendersky has a nice series of articles on load time relocation, PIC on x86, and PIC on x86-64.
Screen is a ncurses-based terminal multiplexer. There are tons of useful things you can do with it, and innumerable blog posts describing them. I have two common use cases:
- On my local host when I don't start X Windows, I login to a
virtual terminal and run
screen. Then I can easily open several windows (e.g. for Emacs, Mutt, irssi, …) without having to log in on another virtual terminal. - On remote hosts when I'm doing anything serious, I start
screenimmediately aftering SSH-ing into the remote host. Then if my connection is dropped (or I need to disconnect while I take the train in to work), my remote work is waiting for me to pick up where I left off.
Treehouse X
Those are useful things, but they are well covered by others. A few
days ago I though of a cute trick, for increasing security on my local
host, which lead me to finally write up a screen post. I call it
“treehouse X”. Here's the problem:
You don't like waiting for X to start up when a virtual terminal is
sufficient for your task at hand, so you've set your box up without a
graphical login manager. However, sometimes you do need a graphical
interface (e.g. to use fancy characters via Xmodmap or the
Compose key), so you fire up X with startx, and get on with your
life. But wait! You have to leave the terminal to do something else
(e.g. teach a class, eat dinner, sleep?). Being a security-concious
bloke, you lock your screen with xlockmore (using your Fluxbox
hotkeys). You leave to complete your task. While you're gone
Mallory sneaks into your lab. You've locked your X server, so you
think you're safe, but Mallory jumps to the virtual terminal from
which you started X (using Ctrl-Alt-F1, or similar), and kills your
startx process with Ctrl-c. Now Mallory can do evil things in
your name, like adding export EDITOR=vim to your .bashrc.
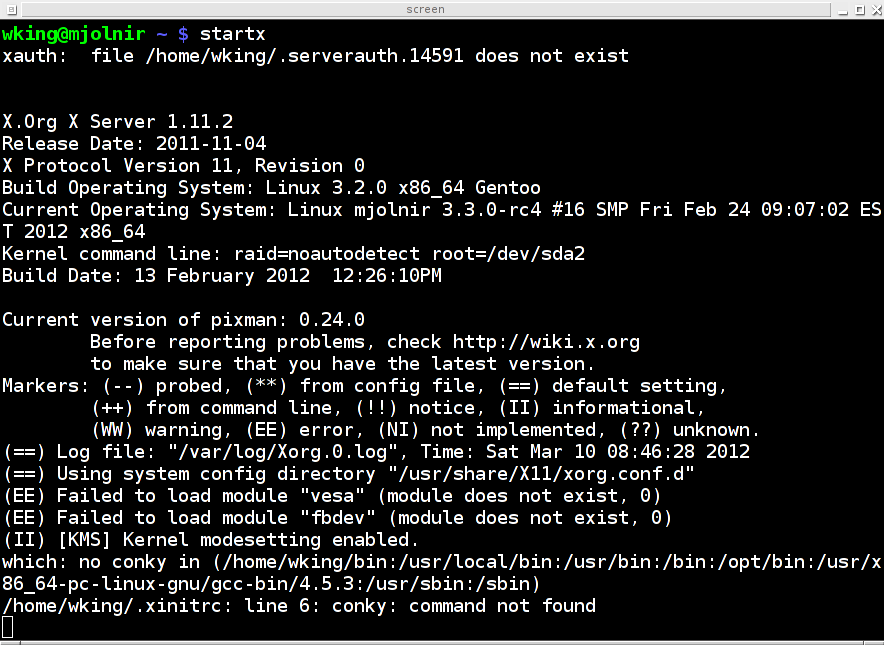
So how do you protect yourself against this attack? Enter screen
and treehouse X. If you run startx from within a screen session,
you can jump back to the virtual terminal yourself, detach from the
sesion, and log out of the virtual terminal. This is equivalent to
climing into your treehouse (X) and pulling up your rope ladder
(startx) behind you, so that you are no longer vulnerable from the
ground (the virtual terminal). For kicks, you can reattach to the
screen session from an xterm, which leads to a fun chicken-and-egg
picture:
 |
Of course the whole situation makes sense when you realize that it's really:
$ pstree 14542
screen───bash───startx───xinit─┬─X
                               └─fluxbox───xterm───bash───screen
where the first screen is the server and the second screen is the
client.